
From howtochangeatires.com:
How to Change a Tubeless Tire is a useful skill every rider should know.Tubeless tires have greatly reduced flats, but they still happen, and tires wear out over time due to seasons and trail conditions, so eventually you’ll need to swap them out. A simple, mess-free replacement guide is needed.
Tubeless systems work by sealing the tire directly onto the rim no inner tube, and are inflated with a standard pump. This eliminates pinch flats (caused by hitting rocks/objects too hard) and reduces puncture flats thanks to sealant inside the tire that fills small holes. Tubeless setups are typically lighter and allow lower tire pressure, improving traction and overall ride quality. It’s recommended only for tubeless-ready or tubeless-compatible rims and tires. Converting standard, non-compatible rims/tires to tubeless isn’t advised.
A step-by-step installation guide, including a video tutorial, walks riders through the process of fitting tubeless tires.
Removal and installation procedures for tubeless tires are also covered in detail.
All of this content can be presented under howtochangeatires.com as a single combined guide covering installation, removal, and replacement of tubeless tires.
You May Also Like:
- How to Change a Flat Tire
- How to Jack Up a Car to Change a Tire (Step-by-Step)
- How to Check Tire Pressure
- Tire Size Calculator
- How to Change a Tire Without a Jack
TOOLS/SUPPLIES NEEDED
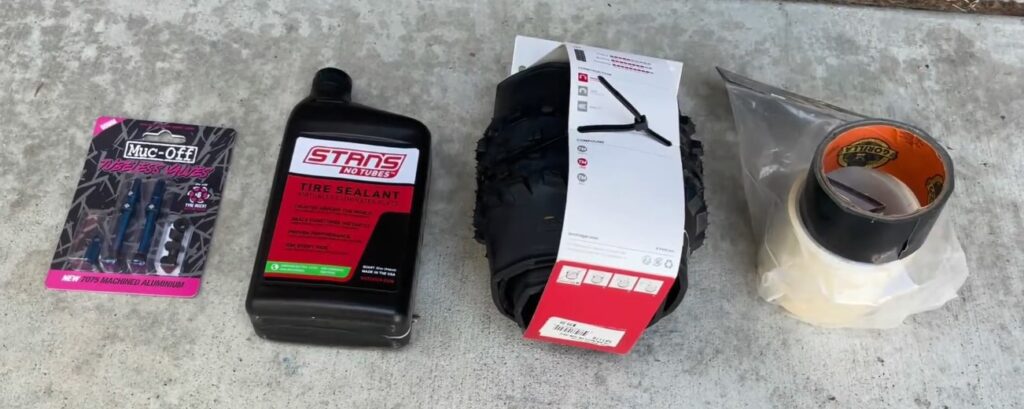
Here’s a consolidated list of everything you need for a tubeless tire setup:
Core components:
- Tubeless-compatible tires and rims
- Tubeless rim tape (matched to your rim’s internal width)
- Tubeless valve stems
- Tire sealant
Tools:
- Tire levers
- Floor pump or air compressor (with inflator head if using compressor)
- Valve core removal tool
- Sharp scissors and/or a pick (for tape installation)
- Screwdriver
Cleanup/prep supplies:
- Rags
- Soapy water or rubbing alcohol/bike cleaner (for cleaning rims and lubricating tire beads)
Optional but helpful:
- Syringe (for adding sealant through the valve)
- Measuring cup (for sealant)
- Patience (per Park Tool and honestly, fair point)
DEFLATE/REMOVE TIRE STEPS
Step 1: Deflate the tire Remove the valve core or depress the valve to let all air out. Keep the valve pointed away from the bottom of the wheel (not facing down) to avoid sealant clogging it.
Step 2: Debead the tire Push both edges of the tire toward the center of the rim with your hands, working around the full circumference until the bead unseats from the rim (you may hear/feel it pop loose). If it’s stubborn, lay the wheel over a bucket and press the sidewalls with a tire lever.
Step 3: Remove the tire from the rim Pry one bead off the rim by hand or with a tire lever, watching for sealant spilling out (tip: a turkey baster or syringe can suck out leftover sealant first to avoid mess). Once one side is off, the other side comes off easily.
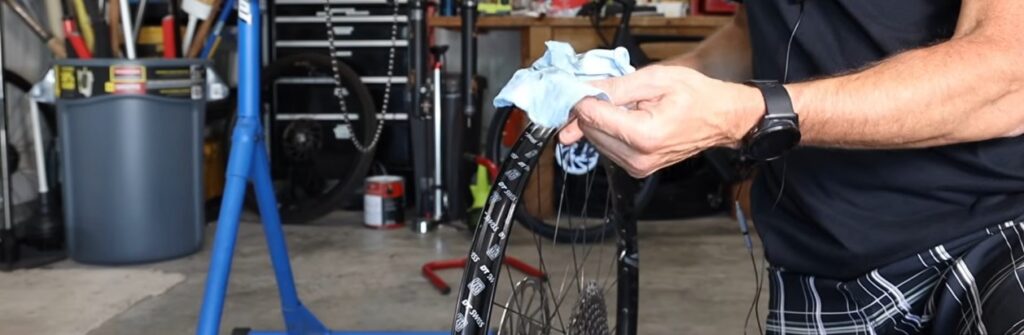
Step 4: Clean the rim and tire Wipe down the rim and bead area with a rag and rubbing alcohol, removing sealant residue and checking the rim/tape for damage. If reusing the tire, clean its bead too. Remove old rim tape if needed (new tape is recommended if unsure), and make sure the rim is completely dry before continuing.
Step 5: Remount and reseal Mount the new (or cleaned) tire, leaving about a quarter of the bead unseated. Pour in fresh sealant, then finish seating the bead. Use an air compressor to pop the bead into place, reinsert the valve core, inflate, and you’re ready to ride.
Rim Tape Installation
- Check compatibility – Confirm your rim, tape, and tire are all tubeless-compatible.
- Choose tape width – Match the tape width to your rim’s internal width; it should cover the full rim bed without interfering with the bead hooks.
- Position the start point – Locate the valve hole. Start applying tape 1-3 spokes before the valve hole (not directly at it).
- Shape the starting end – Cut the corners off the tape’s starting end to form an “arrow” point this helps it sit into the rim’s center channel.
- Apply with tension – Center the tape, press the start down firmly, then wrap around the entire rim. Keep it tight and straight, pressing firmly into the center depression and working outward. Insufficient tension can cause poor sealing and air loss later.
- Finish the overlap – Continue past the valve hole by about 3 spokes (or a few inches) for double coverage and a tight seal, then cut with sharp scissors.
- Seat the tape firmly – Run a plastic tire lever or a rag-covered hand along the entire tape to press it down and ensure full adhesion.
- Inspect – Check that the tape is centered, no spoke holes are visible, and there are no folds, ripples, or air bubbles (these can cause leaks).
- Cut/mark the valve hole – If your tape doesn’t have a pre-cut hole, you’ll need to puncture/cut one through the tape at the valve location (covered in the next step of most guides).
VALVE INSTALLATION
Valve Installation
- Create/check the valve hole – If the tape doesn’t have a pre-cut hole, puncture it with a pick or small screwdriver (just wide enough for the valve, careful not to tear tape or scratch the rim).
- Insert the valve – Push the valve stem through, ensuring the rubber base sits snug against the rim/tape.
- Secure the valve – Add the O-ring (if included) and locking nut, finger-tighten while pressing the valve firmly into the rim bed. Use a tire lever’s flat edge to tighten further for a secure, leak-free fit.
Tire Mounting
- Prep the tire – Wipe the inside clean of old sealant. Check sidewall arrows/markings for correct rotation direction.
- Align the tire – Mount it facing the correct direction, with the logo/pressure label lined up near the valve for easy reference.
- Install the first bead – Starting 180° from the valve, work this bead fully onto the rim, pushing it into the drop center (not against the rim wall) for max slack. Hold the installed section in place as you go so it doesn’t pop off. Use a tire lever for the last few inches if needed (careful not to damage the tape).
- Start the second bead – Begin at the valve and work around, but leave the last few inches uninstalled (this gap is needed for adding sealant in the next step).
- Seat the final section – If finishing it now: work both hands away from each other from the side opposite the valve, pushing slack toward the valve area to ease the last section over the rim. Ensure the first bead stays pushed into the center channel to maximize slack. Use tire levers cautiously to protect the rim tape.
REMOVE VALVE CORE (BEFORE SEALANT)
After confirming the valve is secure in the rim, unscrew and remove the valve core (the small silver piece inside) using a valve core removal tool. Set it aside safely you’ll need it later. Removing the core lets you add sealant through the valve and inflate air faster.
Adding Sealant Steps
Method 1: Pour Method (before fully seating the bead)
- Leave a small section of the second bead uninstalled (as in the previous step) and rotate this gap to face down.
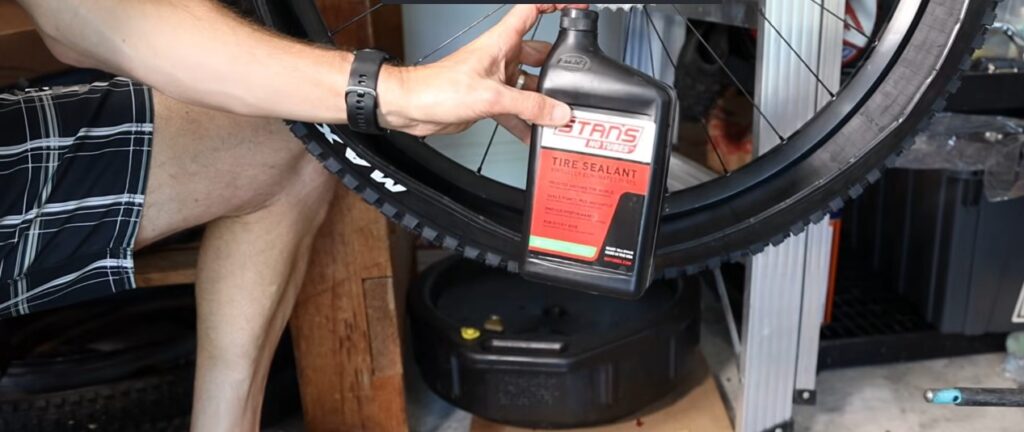
- Pour in the recommended amount of sealant (roughly 30-40 mL, or 2-3 oz, per tire).
- Slowly rotate the wheel so the sealant stays at the bottom while the unmounted section comes to the top.
- Finish seating the bead use a tire lever if needed, and lubricate with soapy water or alcohol for tight beads.
- Inflate to at least the pressure listed on the tire’s sidewall (a compressor is recommended, though a floor pump can work with compatible bead/rim combos).
- Double-check the bead near the valve isn’t snagged this is the most common cause of inflation problems.
Method 2: Injection Method (after fully seating the bead)
- Mount both beads completely before adding sealant.
- Remove the valve core with a valve core remover.
- Inflate fully with an air compressor so the bead seats properly (a floor pump may work for compatible systems like UST).
- Remove the air head the bead should stay seated.
- Use a syringe to inject the recommended amount of sealant through the valve (you may need to “burp” the syringe due to pressure).
- Reinsert and secure the valve core.
General notes
- Recommended sealant amount: ~30-40 mL (1-1.5 oz) per tire, though some sources suggest up to 2-3 oz.
- After adding sealant and inflating, rethread/reinsert the valve core if removed and inflate fully.
- Sealant dries out over time refresh it every few months.
Inflating & Seating the Bead Tire
- Inflate quickly with a floor pump – Give it a few fast, powerful strokes to push a high volume of air in quickly. This “pops” the bead onto the rim shelf. A floor pump works for most modern tubeless setups; if it won’t seat, use an air compressor or tubeless charger.
- Listen for the pops – Loud popping sounds are normal and indicate the bead is locking into place against the rim.
- Inflate to max pressure – Pump up to the maximum PSI listed on the tire’s sidewall (typically around 110-120 PSI for road tires), but never exceed the rated rim or tire pressure.
- Check the bead seating – Visually inspect that the bead sits evenly all the way around the rim on both sides. If a section is sitting too low: deflate, break the bead at that spot, lubricate with soapy water, and reinflate.
- Optional test (REI) – Once seated, you can fully deflate the bead should stay seated even with no air inside, confirming a good seal.
- Final inflation and spin – Reinflate to your normal riding pressure, remount the wheel on the bike, and spin it to help distribute the sealant evenly around the tire.
Final Checks & Sealant Distribution
Check for a wobble – Spin the wheel to confirm the bead is fully seated. If it wobbles, deflate, reinflate to max sidewall pressure while squeezing the sidewalls you should hear the bead “ping” into place.
- Distribute the sealant – Spin the wheel for ~30 seconds, oscillate it horizontally (and flip to repeat on the other side), or bounce it on the ground to splash sealant up against the bead.
- Let the sealant set – This can happen instantly (UST systems) or take hours/days for other setups, as the sealant finds and plugs small leaks. Periodically re-spin the wheel and top up air pressure during this time.
- Test for leaks – Some initial bubbling/seepage at the bead is normal. Reinflate to max PSI and check that pressure holds steady overnight to confirm a good seal.
- Set final riding pressure – Once sealed, deflate to your preferred riding pressure (never exceeding the lower of the tire’s or rim’s max rating).
- Go for a ride – Riding helps further distribute sealant naturally.
- Carry a spare tube – Tubeless sealant can’t fix large cuts or gashes, so always carry a spare tube as backup.
Troubleshooting & Repair
If the bead won’t pop into place:
- Remove the valve core to increase air volume/flow while pumping.
- Spray isopropyl alcohol or soapy water on the bead to reduce friction.
- If a floor pump isn’t enough, switch to an air compressor or CO2 cartridge for the extra burst of volume.
- Once inflated, check that the tire’s install line sits at a consistent distance from the rim on both sides if uneven, deflate and re-inflate to correct it.
Repairing punctures:
- Most tubeless tire punctures cannot be repaired.
- Exceptions are UST tires or tubeless tires with a butyl inner lining these can sometimes be patched using a vulcanizing patch kit (like Park Tool’s VP-1), following standard inner tube repair methods.
- Other tubeless tire types should not be patched.
FAQs
What If I Forgot To Add In Sealant Before I Installed My Tubeless Tire?
If you did not install your tire sealant with our preferred method, you would now remove the valve core with a valve tool or needle nose pliers and squeeze it into the tire and rim through the valve. Once the sealant is installed, replace the valve core.
Tubeless Bike Tires vs Tubes
With tubeless bike tires, you’ll experience fewer flats, have better traction, and save weight.
What Is A Tubeless Tire?
A tubeless tire does not require an inner tube and, once it’s “seated,” it forms an airtight seal with the bike rim.
How Does A Tubeless Tire Work?
A tubeless tire has a bead that “seats” against the bike rim’s wall. This “seating” creates an airtight seal. Using tubeless tire sealant automatically plugs any small holes that form in your tubeless tires.
How Much Do Bike Tires Cost?
Bike tires cost anywhere between $25 – $100. Tubeless bike tires cost between $35 – $85.
Are Tubeless Tires Better?
Tubeless tires are better than tube tires. Tubeless tires give you better ride quality, better traction, better cornering, and they maintain momentum better. They also weigh less than tubed tires, are easier to repair for flats, and have fewer flats.

Mason Carter is an automotive technician helping drivers master tire maintenance with clear, practical guides. With years of hands-on experience, he breaks down complex tire care into simple, actionable steps for every skill level.
Through HowToChangeATires.com, Mason simplifies complex automotive concepts into clear, actionable guides that empower vehicle owners to take control of their maintenance. Whether you’re a first-time tire changer or looking to refine your skills, Mason’s detailed tutorials and expert tips ensure you have the knowledge and confidence needed for the job.